 Do you know how to sew?
Sewing a tiny sweater for your newborn niece, Altering your dress for prom the next day, or making DIY for your grandchildren.
It’s a real pleasure.
You would wish you had learned to sew when you live through beautiful moments like these in your life.
However, it’s never too late to acquire a new skill. Start learning how to embroider in 2023. It may be the talent hidden inside you as, for some, it becomes a passion.
It takes practice and patience to master this skill; it’s easy to get the hang of it when you learn the basics. Don’t worry, you have come to the best place to cultivate your sewing art and learn to stitch for beginners.
This article will be your summarized guide for sewing 101. I will guide you through all the basics from sewing with a needle to sewing with a machine.
How To Sew? Is it By Sewing Machine or By Hand?
To be honest, the choice of the sewing method all comes down to you. Both produce the same results and are easy to learn.
However, if you want the work done faster and in bulk, then the home embroidery machine should be your choice.
But if you don’t have a sewing machine at home and are comfortable with sewing by hand, then it’s all well and good.
Sew With A Machine
Right Tools For Sew
- Sewing Machine
Brother, Kenmore, and singers are the most recommended brands for commercial sewing machines. Sewing machines are available both mechanical and electronic so you can choose depending on your budget scale.
Always remember to check for warranty and repair policies before using the machine. The home business machine should consist of features such as tension adjustment, speed control, power switch, presser feet, top load bobbin, needle positioner, and lightweight.
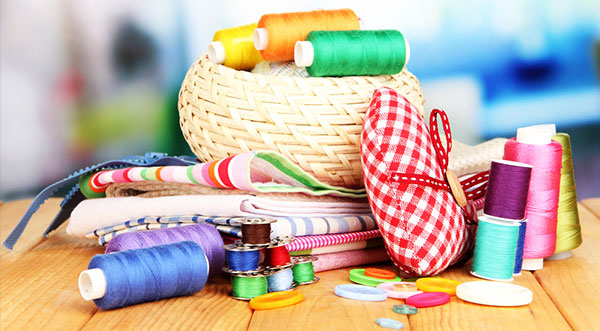
- Sewing Kit With Thread
Sewing kits for beginners have almost the same contents. It would be preferable to keep a variety of threads with different colors made of different materials depending on your fabric. If the thread is not strong enough and breaks frequently, then it becomes very irritating.
- Pins
Pins might become your favorite sewing accessory yet because of the colorful and cute head designs with tails attached to soft cushions. The purpose they serve is to put the fabric you are working on firmly and tightly in place.
However, some essential features of the pin should be considered, such as the thickness, to prevent large unnecessary holes.
The material determines if it’s iron friendly while the shape and size of the head are chosen depending on whether you want it to pass through the fabric or hold.
- Needles
Not investing in the right needle might just mess up the job. It may result in holes in the fabric, break the thread, impair the bobbin hook and result in an imperfect finish. To pick the right needle, keep in mind the type of thread, fabric, and stitch along with the size and shape.
Start Sewing
Before you start sewing, you need to learn how to set up the machine first. That is to feed the machine with thread and wind the bobbin.
- How To Wind A Bobbin?
Might you are not familiar with the name bobbin, but you might have seen seamstresses using it. A bobbin is cylindrical, with the thread wrapped in the middle. Without a bobbin, the sewing machine is incomplete as it is added to supply additional thread to the needle.
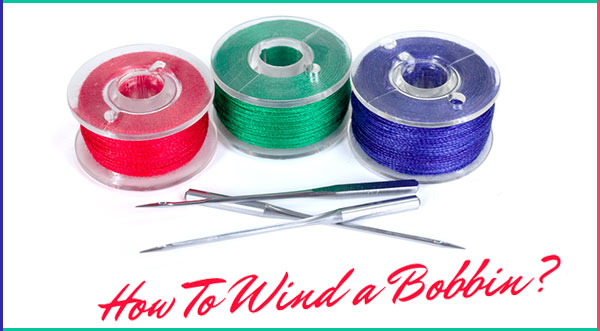
To wind a bobbin properly is crucial as the thread may break and cause a defective stitch. Although it is always better to consult the users’ guide of the specific model first, here are a few general guidelines to give you an idea.
Firstly, pick the thread you wish to use and then open the shuttle cover to remove the bobbin casing. Secondly, the thread spool is placed on the spool pin of the machine. Then the thread is wrapped around the machine’s tension disk.
Thirdly, the thread is inserted into the bobbin, and the bobbin is inserted into the bobbin winder. Then it is secured and locked in one spot. Now you can finally wind the bobbin and slowly start the foot pedal to fill it with thread.
Simultaneously hold the end of the thread you looped in the bobbin at the start. Once filled, cut the thread connecting the spool and the bobbin, and the viola did.
- How To Thread A Machine?
The work hasn’t ended on winding the bobbin. You need to thread the machine before you get started on the actual work. Don’t worry, it may seem hard to set up at first, but you eventually get the hang of it as I did.
So, first of all, take the thread from the spool, extend it towards the thread guide and then loop it around the tension disk as we did above. Further on, wrap the thread around the lever, and move towards the bottom to insert the thread into the needle away from you.
The next step makes use of the bobbin thread that is going to be attached to the lower part of the machine. Once you open the cover of the lower compartment located beneath the needle, take out a few inches of the thread from the bobbin and place the bobbin in the lower compartment.
After the rotation of the bobbin, according to instructions that are mentioned on the machine, reveal the thread and close the compartment.
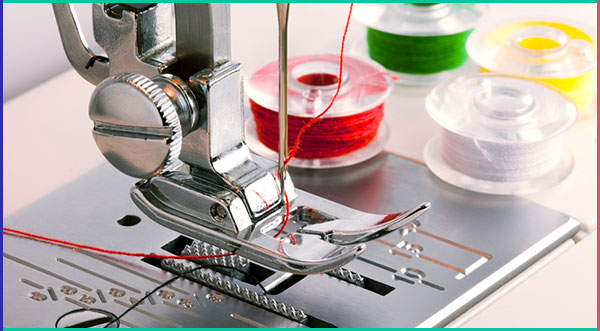
- How To Use A Machine?
The boring part is over, now let’s get on with the fun part. Since you now have both threads in your hands, keep both of them to the left side of the machine. Raise the presser foot and lower it once you have placed the fabric under the needle.
Start the machine and control the speed with the foot pedal. The feed dog does the work of pulling the fabric on its own. However, do hold on to the two threads for the first few stitches to avoid them getting tangled. Once you have done cut the thread with scissors to detach the fabric from the machine.
Sew By Hand
Basic Tools For Sew
Before you start learning this craft, you need to make sure you have all the essential tools in your sewing kit. The necessary tools include needles, threads, and scissors. You cannot sew without these three necessary tools.
However, some other tools will come in handy and make learning to sew easier. For example, a water-soluble pen to mark the spots you are working on, pins to keep your material in place, and a pincushion so that you don’t lose any delicate pins.
Moreover, the iron board and iron are used to give a beautiful finish to your work in the end. A seam ripper, as the name implies, will help you learn from your mistakes, and a thimble protects your thumb.
How To Thread A Needle?
You may require good lighting or reading glasses to make you see the hole in the needle better. Insert the thread into the hole of the needle. Once you are done with this step, take an equal length of thread and then tie a knot to join the ends of the thread, making a secured loop.
Basic Stitches (Running Stitch /Back Stitch)
Sewing is the art and craft of joining together two materials by making one or more stitches. To learn about how to sew well, you have to get the hang of these two stitches.
Now how would you know what type of stitch is the best for your task and how to do them? The two most basic stitches you got to try right away are the running and backstitch.
The running stitch, aka straight stitch, is the foundation of sewing. All you need to do is insert the thread into the needle and pass the needle through from the bottom side to the top side and then vice versa. Make sure you keep the space between each stitch constant.
Let us now focus on the backstitch, which is known to be the strongest and most permanent hand stitch. It is the same procedure. The only difference is that the needle is poked back into the fabric ‘behind’ the previous stitch.
Unlike the running/forward stitch in which the needle poked into the fabric in front of the last stitch.
Frequently Asked Questions
Here we discussed the most common questions about sewing in detail.
How To Sew A Button?
Sewing a button will seem like a piece of cake compared to all that you have learned to do above. Simply select the matching color of the thread and insert it into the needle.
Place the button on the fabric and poke the needle into the fabric, then across the hole in the button and pull the needle up. Now poke the needle in the same way from the button to the fabric and repeat until satisfied that it is secure.
On the last stitch, repeat the same but do not pass the needle through the button. Wrap the thread between the button and stitch. Make a few more stitches on the fabric to lock it and cut off the excess.
How To Sew Seams?
To sew seams means to attach two different fabrics, for example, attaching pockets, laces, or patterns on shirts or other materials. This will require you to use the running or backstitch I taught you above.
Remember to invert the fabric so that the stitches are not visible upfront.
Always remember, the smaller the stitches, the stronger your work.
How To Sew A Hole?
We often end up getting holes in our new clothes, which can be dreadful. Learning to sew holes is better than throwing them out.
First, make sure you are using a matching colored thread so that it is not visible and a thicker needle if you are sewing fabric like denim.
If the hole is too big, you are going to need an additional piece of matching cloth to patch it up. Place the extra piece of cloth on the inside of the material you are stitching.
Start stitching one inch further outside from the torn end to strengthen your work after completing the stitch around the torn area, overlock if it seems necessary.
How To Sew a Rip?
You’ve got to admit we’ve all ripped our clothes accidentally at the most inconvenient times. Learning to sew a rip can be a lifesaver. It’s almost the same as sewing up a hole and seams.
However, if the ripped part is frayed, it will need a trim. Folding the edges of the ripped piece and keeping it in place with a pin will give a better startup. Don’t forget to invert the material. Start doing the stitches, finish up with the knot, and cut the extra thread.
Conclusion
After reading this article, you’re probably dangling your car keys to go to the store and stock your sewing kit to get started asap. After lots of practice with these tips and techniques, you will even get an idea of how to sew a dress by using creativity!
Once you grasp this skill, you can even buy a cheap machine and innovate your sewing work into a masterpiece through embroidery designs.
Leave a Reply